Before Installing:
1. Make sure you have a good running engine to begin with! You don't want to end up chasing your tail trying to troubleshoot a problem that has nothing to do with the ignition.
2. Setting the timing requires patience and an understanding that the system is precise and requires some trial and error to get right. Once set correctly, it will probably never have to be readjusted. That's the beauty of an electronic ignition!
3. Make sure your battery is fully charged prior to installation.
4. Get a good quality test light. Do NOT attempt to set the timing with a dynamic timing light, this will damage the triggers and void the warranty.
5. Use either resistor spark plugs or 5K resistor spark plug caps, we have them available here.
6. Charlie's Place regulator/rectifier is REQUIRED available here and it is recommended to upgrade to a 5 ohm high output coil, available here.
7. If after reviewing the installation instructions and videos where applicable you feel this job would be better suited to a professional mechanic please contact a local shop about doing the installation prior to purchase.
Installation Instructions:
1. Power must be off.
2. Disconnect negative terminal from battery.
3. Remove existing points and condensers.
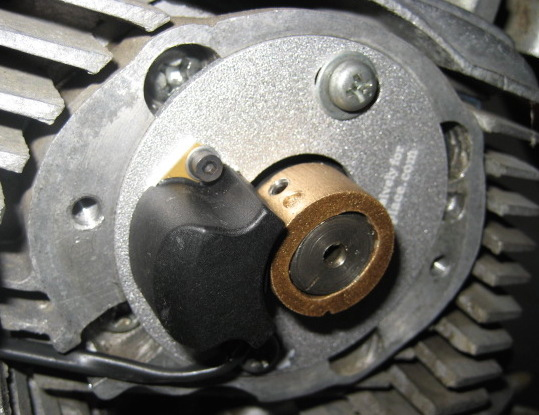
4. Install new rotor. Rotor must be mounted flush with top edge of shaft and positioned so that magnets are on the outer edge. Roughly center rotor on shaft. Set screw should be closer to the motor than the magnets are. Use set screw to snuggly affix rotor to shaft.
5. Install new plate with pickup already mounted as shown in picture (DO NOT REMOVE pickup from plate).

6. Plug unit in as follows: route wires back through frame and pull them through front hole in frame (behind right side cover) where the main coil leads are routed; plug coil wires directly into wires from ignition unit. Plug Black male from coil into Black female from unit. Plug Green male from coil into colored wire from unit (either blue or yellow). Plug extra male black lead from unit into black coupler at harness where Black wire from coil was originally plugged in. Note: You are only plugging one wire back into the harness.
7. Connect a test light in series with the colored wire of the pickup. This should still be plugged into the coil when testing.
8. Ground the other side of the test light to the motor by clipping it to an unpainted surface.
9. Check to ensure that neither magnet on the rotor is facing the pick up before turning power on.
10. Reconnect negative battery terminal. Turn the power on. Note: At this point, you will see a light come on brightly. This is normal.
11. Rotate the rotor that's on the end of a crank shaft with a 14mm wrench in a clockwise rotation to check the timing. The test light should go out roughly 40 degrees before the magnet reaches the trigger on the ignition plate. The light must come on at the “F” mark. This is how you set the timing. If adjustment is necessary, loosen the plate and rotate slightly. Do not loosen the screws affixing the pickup to the plate.
12. On 360 degree crankshaft bikes, it’s necessary to check the timing twice. After you have aligned your plate to get the light to come on at the “F” mark, rotate the crankshaft 360 degrees (this is 180 on the camshaft) and check the timing again. There will often be a slight variation between the two sides of the camshaft. This is due to unevenness in the length of the cam chain. It will necessary to get the two sides as close as possible. If the two sides seem dramatically off from each other, flip the gold rotor on the end of the camshaft 180 degrees and check again.
13. After your timing is set, carefully reinstall your points cover. If it does not seem to be fitting well, don't force it. Breaking the trigger cover will compromise the integrity of the unit and void any warranty.
Please note: It may be necessary to change the position of the small rotor on the end of the cam shaft in order to ensure that your timing is "Dead on."
Installation support available by calling Charlie's Place (818) 550-0600 or emailing
