Before Installing:
1. Make sure you have a good running engine to begin with! You don't want to end up chasing your tail trying to troubleshoot a problem that has nothing to do with the ignition.
2. Setting the timing requires patience and an understanding that the system is precise and requires some trial and error to get right. Once set correctly, it will probably never have to be readjusted. That's the beauty of an electronic ignition!
3. Make sure your battery is fully charged prior to installation.
4. Get a good quality test light. Do NOT attempt to set the timing with a dynamic timing light, this will damage the triggers and void the warranty.
5. It is recommended to replace spark plugs and caps.
6. A Charlie's Place regulator/rectifier is REQUIRED on pre 1969 models.
7. If after reviewing the installation instructions and videos where applicable you feel this job would be better suited to a professional mechanic please contact a local shop about doing the installation prior to purchase.
Installation Instructions:
1. Power must be off.
2. Disconnect negative terminal from battery.
3. Remove existing points and condensers.
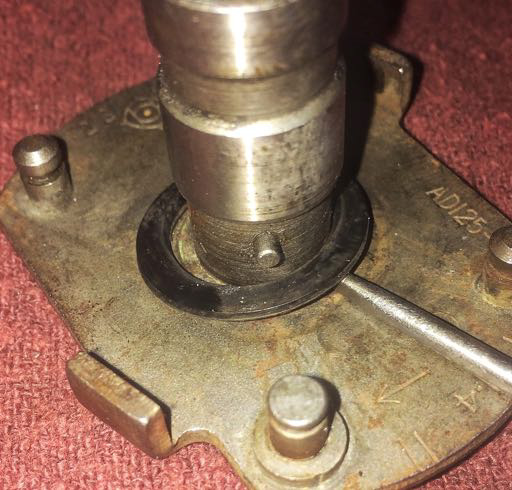
4. Carefully remove outer rotor from advance unit. Check springs on advancer to make sure they are operating properly. Lubricate or adjust if necessary. Install new rotor. Be sure to remove any shim washers at the base of the advancer shaft. Also check to see if there is a cast in pin also near the base of the shaft. This will need to be ground off to install the new rotor. Orientation of rotor is not important.
5. Please note that not all advancers are of even height therefore it may be necessary to shim the end of the camshaft or advance mechanism so that the retaining washer on the end of the camshaft does not bind against the rotor. This must be checked carefully. Washers are provided for this purpose; it may be necessary for better fit to use other washers as well. Also note on some models the retaining washer has a smaller O.D. than the I.D. of the new rotor. Therefore, a larger retaining washer is provided with the unit.

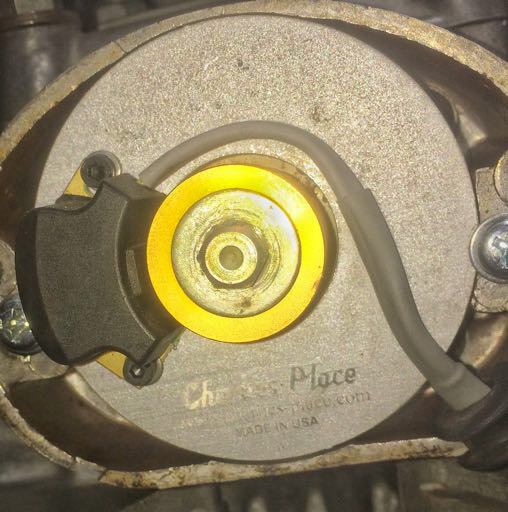
6. Install new plate with pickup already mounted. DO NOT REMOVE pickup from plate. The pick up should be on the Left side of the plate, at what would be 9 o’clock. It may be necessary to remove the washer from the Left hand plate securing screw in order to make sure the plate is secure without problems.

7. Plug unit in as follows: female Blue coupler to male Blue from coil; Black female connector from unit plugs into Black male connector from coil. Black male coupler from unit plugs into Black wire at harness (previously connected to Black male wire from Coil).
8. Do not attempt to set your timing using a dynamic timing light. It will damage the triggers if the ignition plate is loose/loosened while the bike is running. This will cause a ground failure that will short the capacitors inside the triggers. A dynamic timing light may be used to check advance only. If adjustment is necessary, turn power off before making any adjustments or loosening the screws that hold the ignition plate on.
9. Reconnect negative battery cable. Using a 12volt test light, hook up one end to ground (on the engine) and run the other end of the test light in parallel with the blue or yellow wire that comes from the unit (where it plugs into the coil). Rotate the crankshaft rotor to check the timing. The light will stay on until approximately 40 degrees before the “F” mark reaches the pointer. This is the point at which you should set your timing. The light should come on exactly at the "F" mark. If adjustment is necessary, rotate the entire plate to set the timing. Note: Do not touch the pick up fastening screws or attempt to adjust the position of the pick up on the plate. Rotate the entire plate to adjust.
10. On all 160/175/200 parallel twins it is necessary to rotate the crankshaft two full revolutions to correctly check the timing for both cylinders. Often it is necessary to “average” the two readings, or find a setting that allows the closest timing on both cylinders. Our magnets (on the rotor) are exactly 180 degrees from each other. However, the cam chain is rarely an even length on both sides.
Installation support available by calling Charlie's Place (818) 550-0600 or emailing
