Note: This unit is not compatible with Lithium batteries that can not accept a charge over 14V. The 12V regulator rectifier has a max output of 14.82V and the 6V version has a max output of 8.5V
1. Remove old regulator and rectifier. (CA/CB/CL72/77's only had a rectifier)
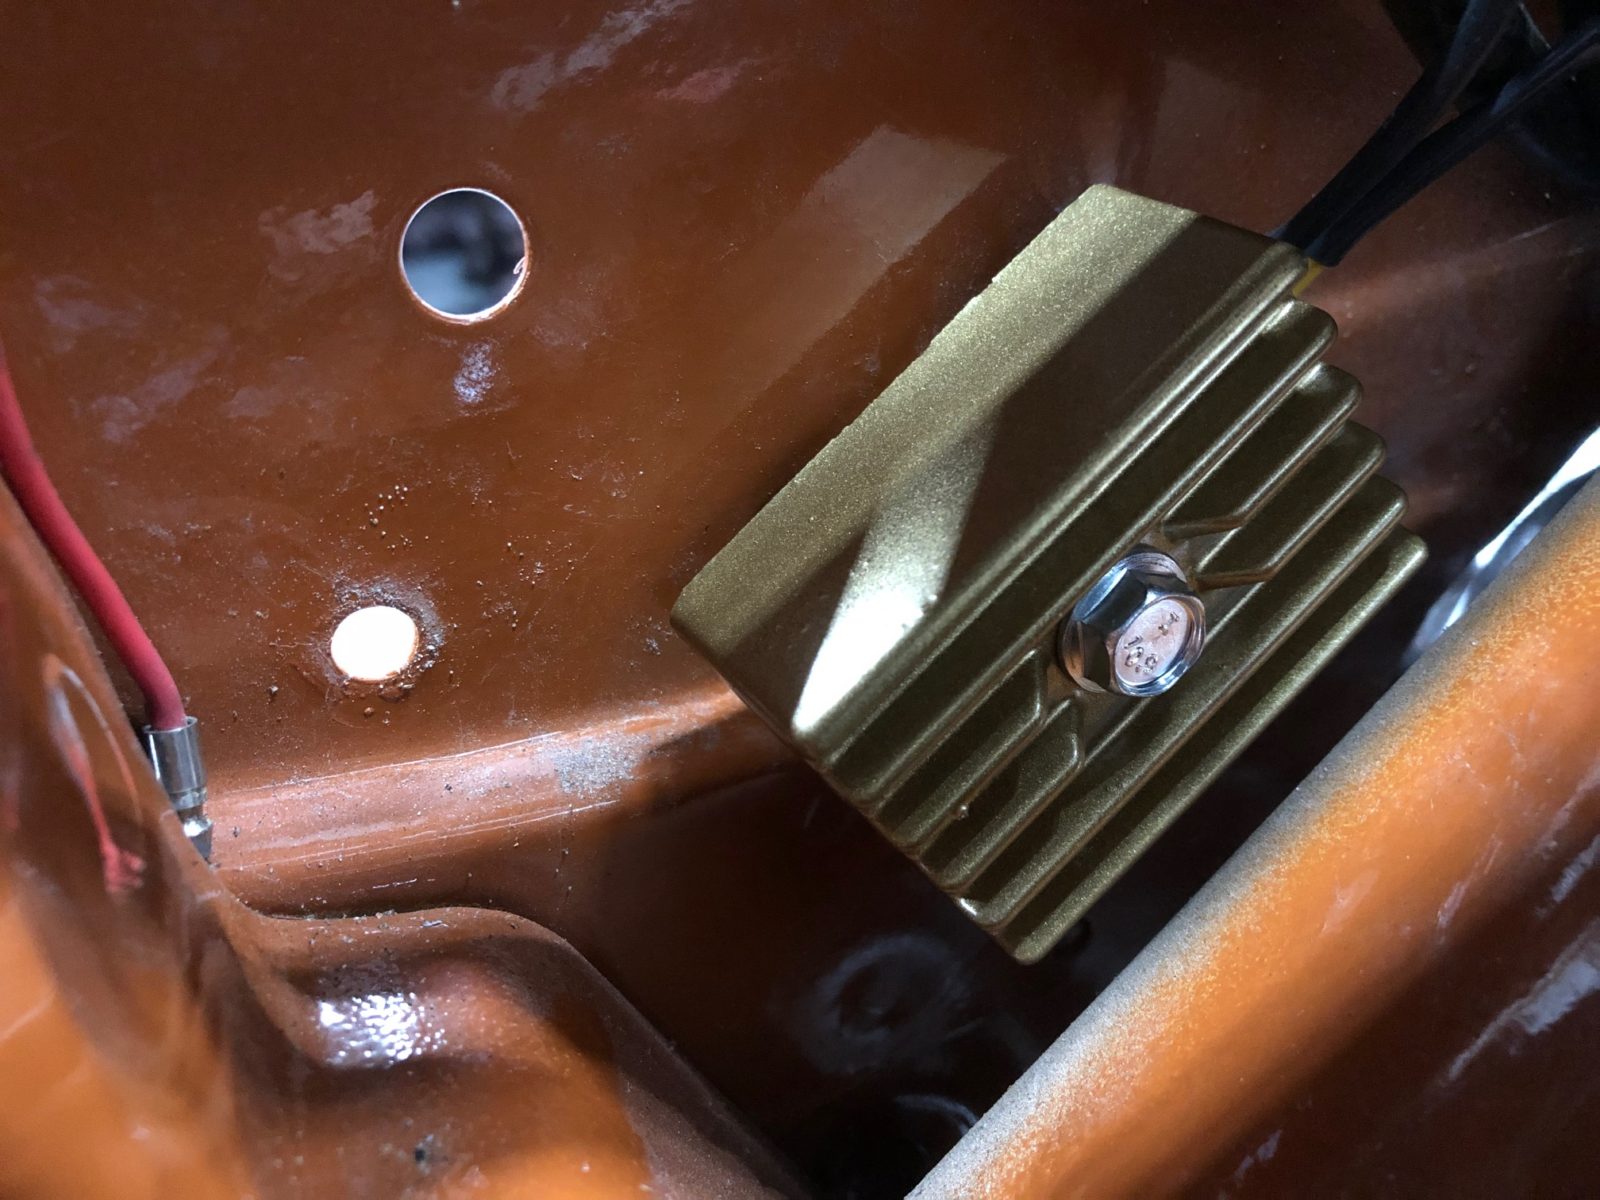
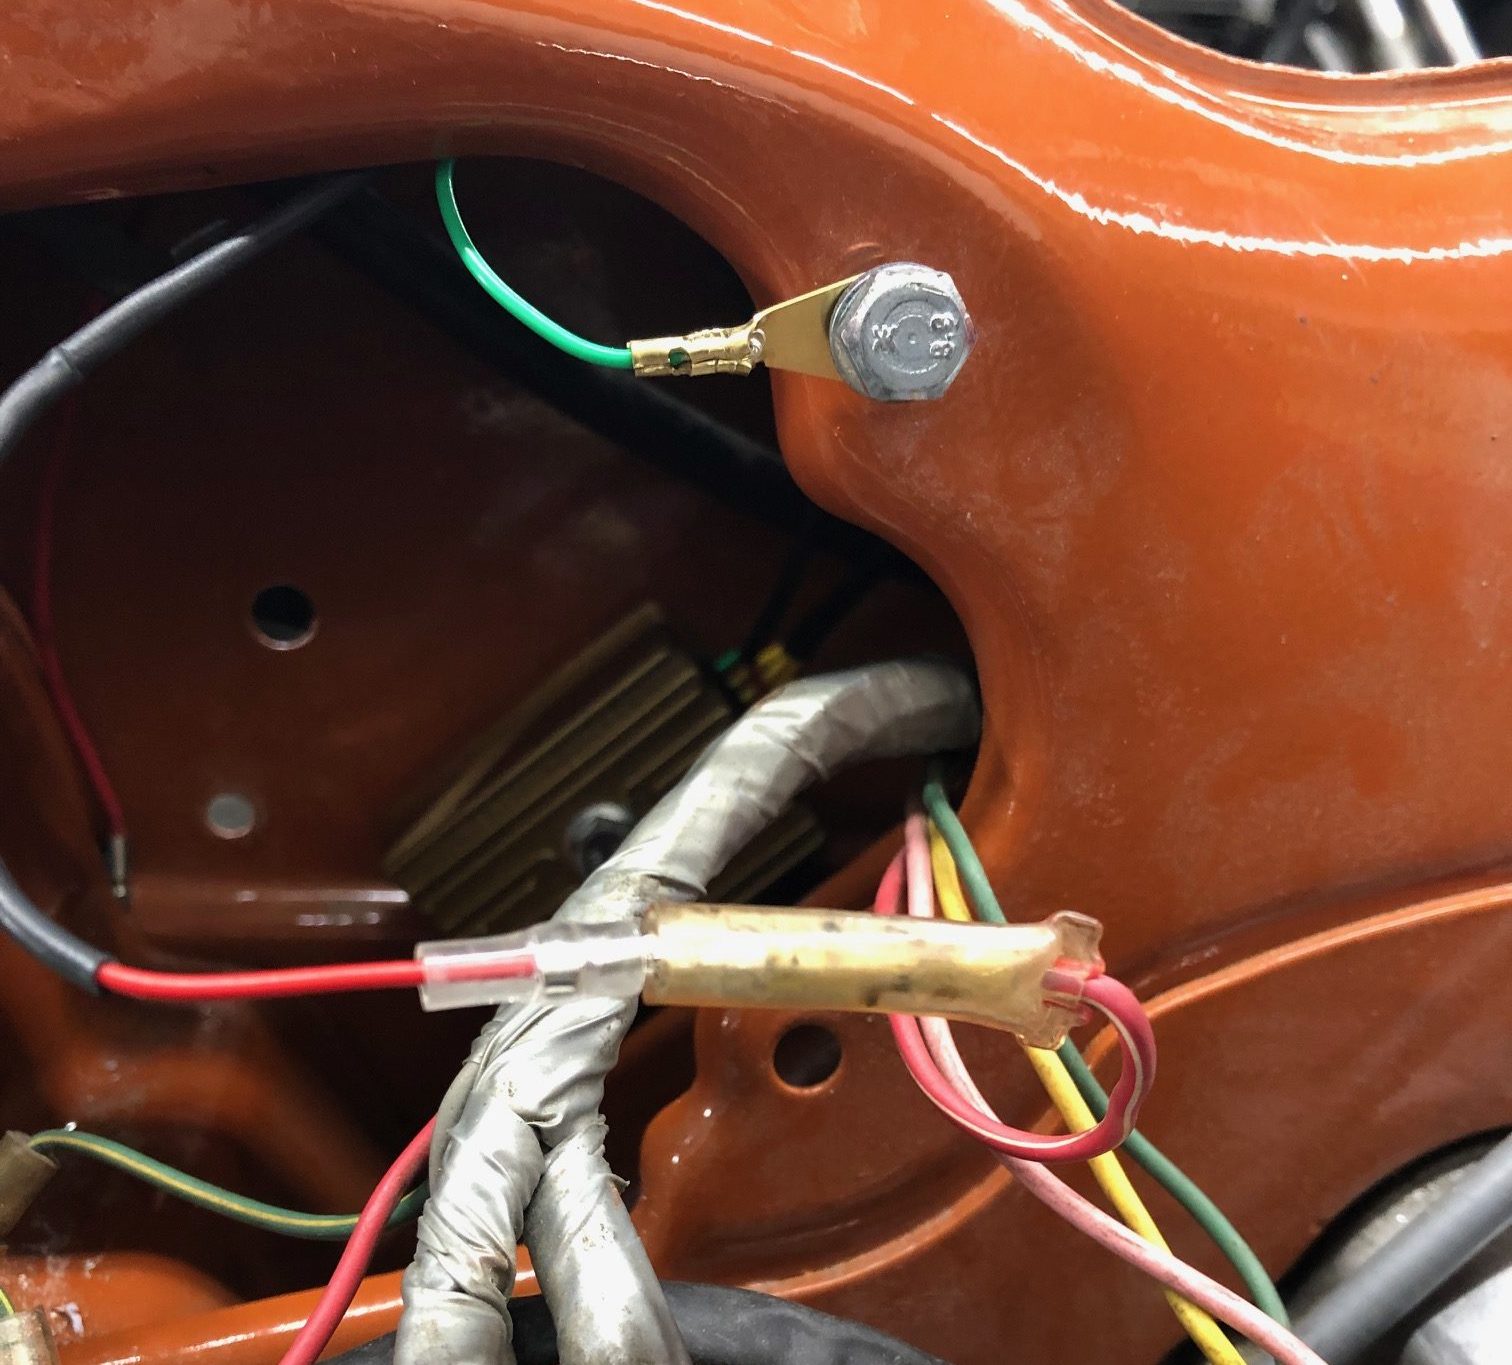
2. Mount new regulator rectifier where original rectifier was mounted. Make sure the unit has a solid ground at the mounting point. Also make sure wires are not kinked or crushed where they exit the unit.
3. Cut off and tape up connector or wires from harness that connected to original rectifier. You will NOT be connecting your new regulator rectifier to the wires from your old rectifier.
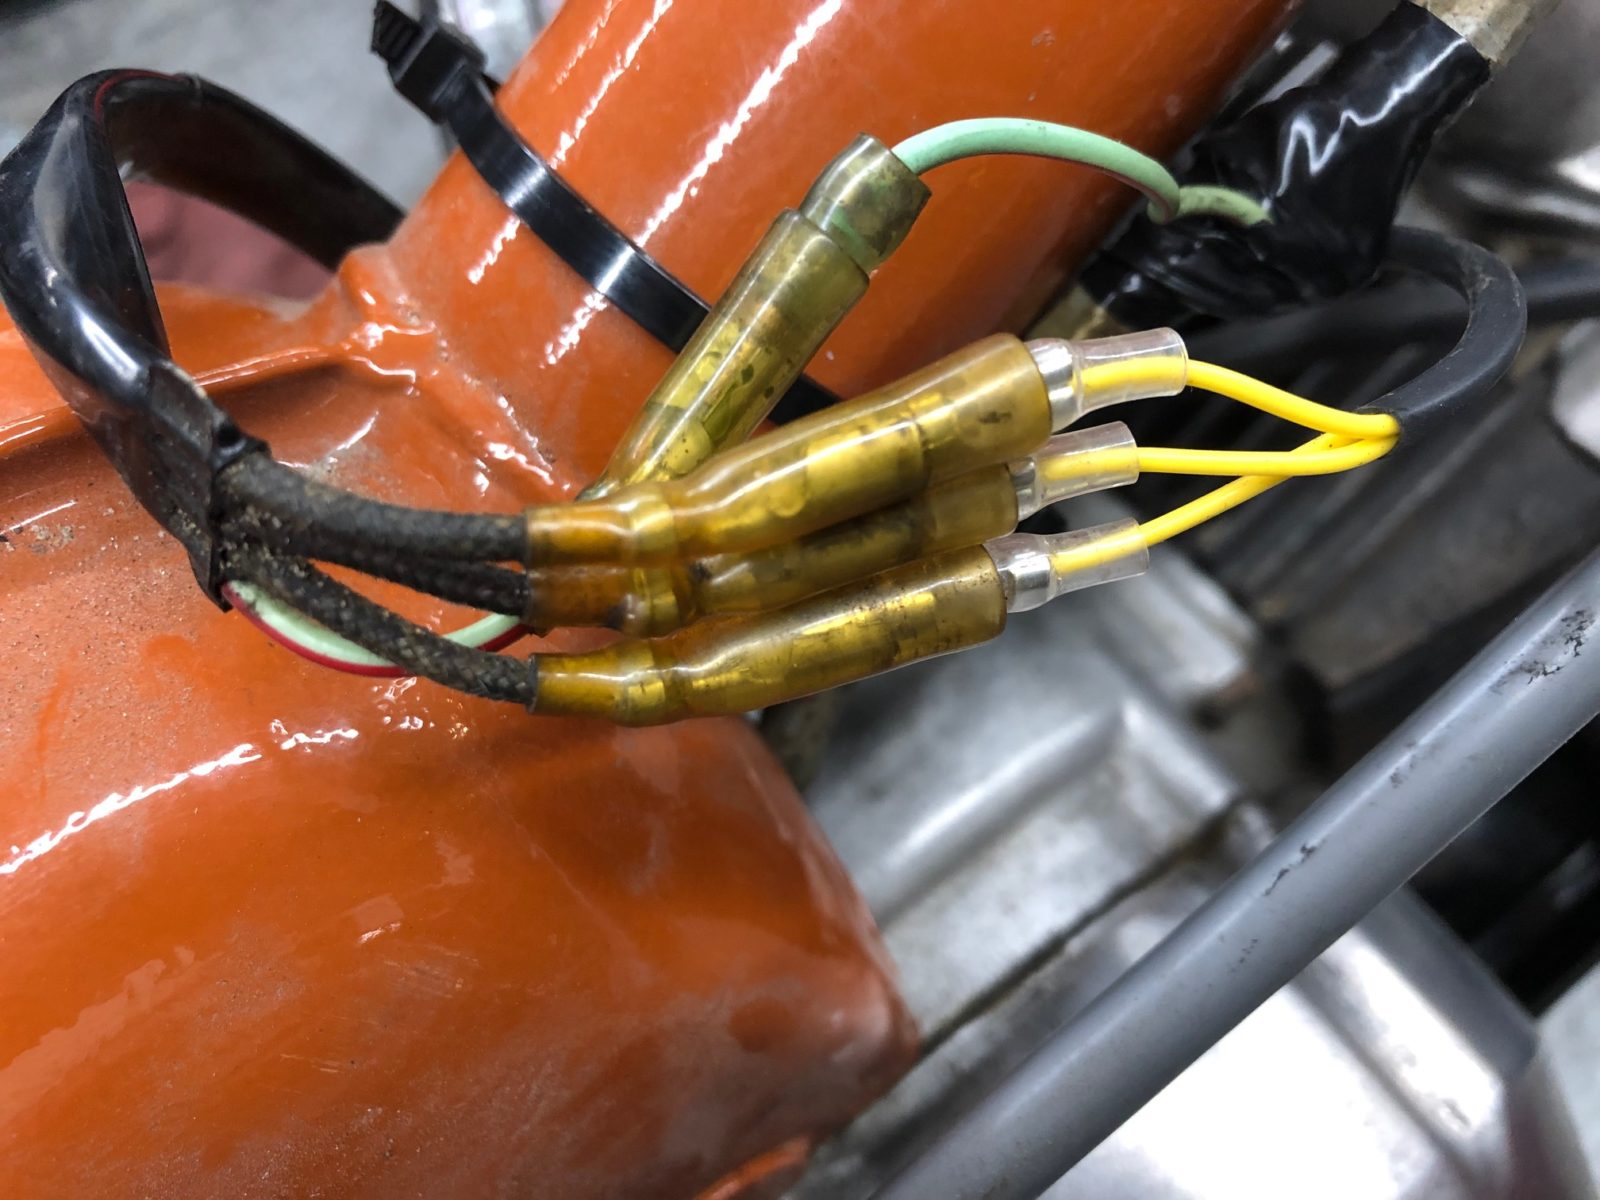
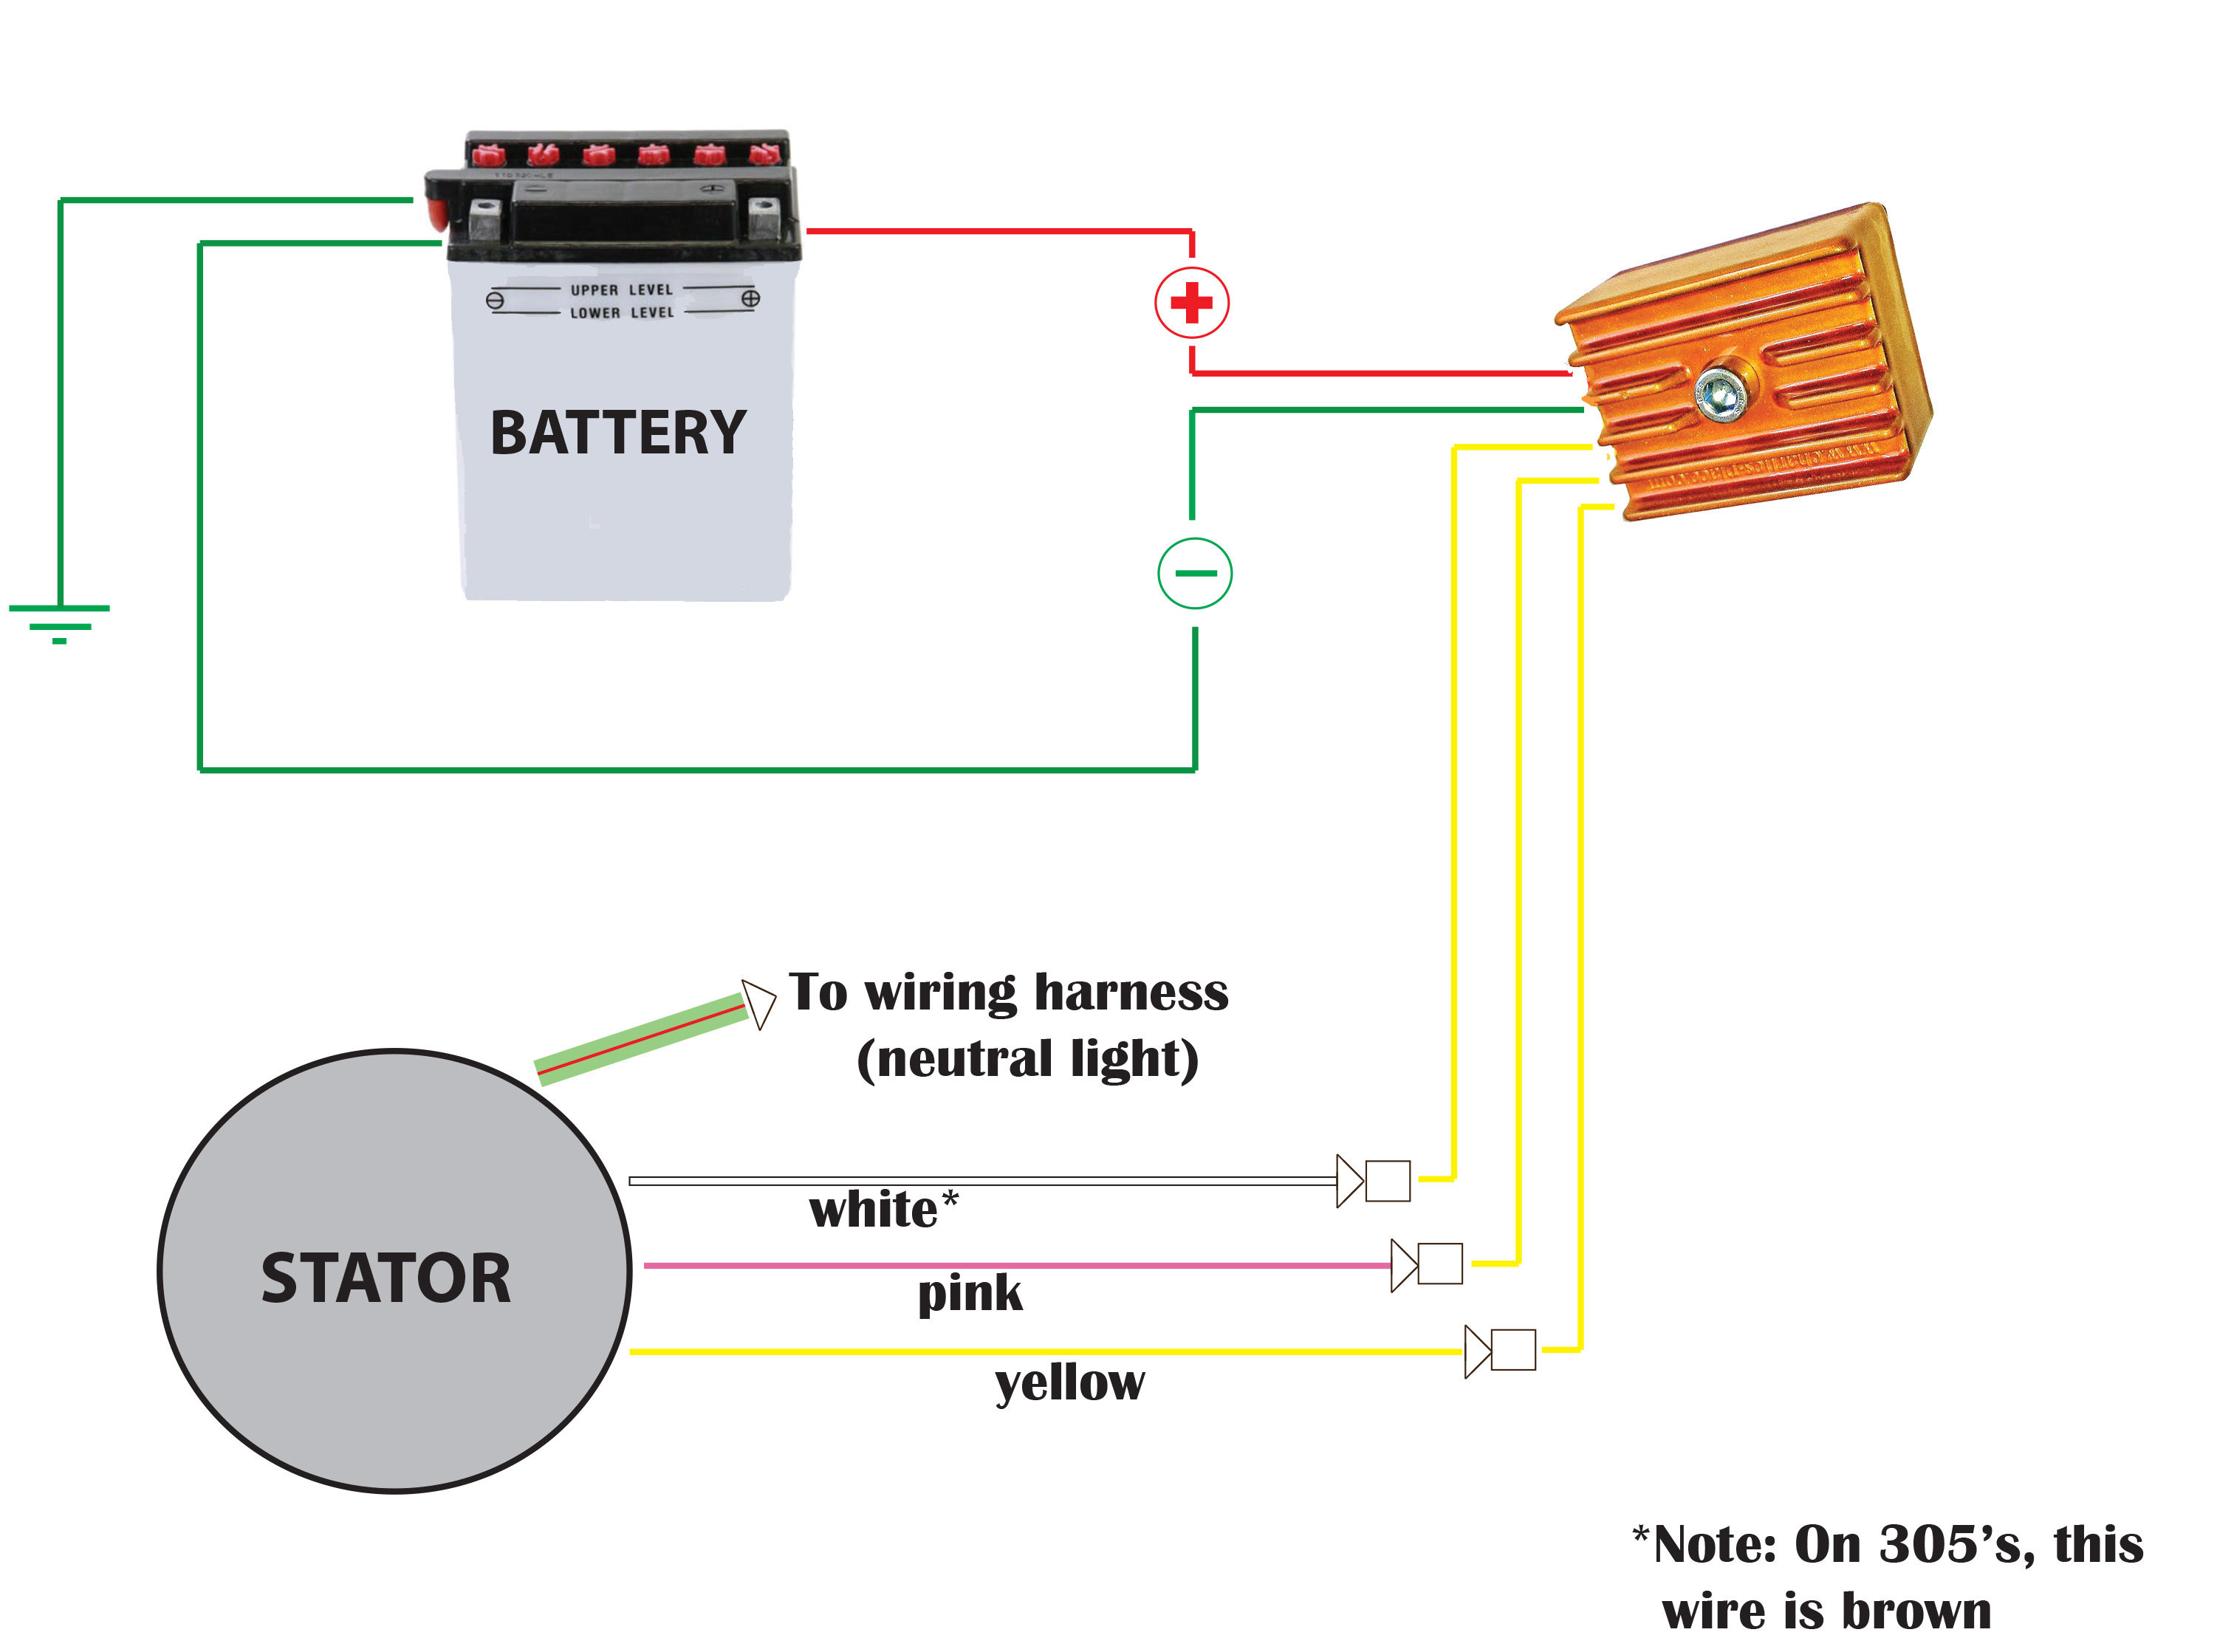
4. Connect three yellow wires from the new regulator rectifier to the three wires coming from the stator which exit from the bottom of the motor.
5. There is a fourth wire coming from the stator that is light green w/red stripe. It has a different type of insulation than the other three wires. This is the neutral light switch wire and needs to be plugged back into the harness.
6. Connect red/white striped wire from unit to battery positive, and connect green wire from unit to battery negative.
90cc Honda Model Photos


